Yandex is the biggest search engine in Russia. Of course, as a site owner, you need more views and visits from different countries. If you’re looking for audience to your blog from Russia, you need to index your blog with Yandex webmaster. Here, I’m writing on how to index your blog with Yandex webmaster | beginner’s full guide.
First, you may ask, what is the compatibility of Yandex webmaster site? Yandex webmaster site is compatible for both mobile and desktop users. The only difference is that on desktop, you must click on the tab (three lines) at the top of your screen, to bring out a list of options. While on desktop, you don’t need to click any tab to display options.
How to index your blog with Yandex webmaster
There are two steps for you to index your site on Yandex webmaster, which are adding your URL, and verifying your rights. Verification of right means that, you need to prove that you are the owner of the site/blog.
To index your website with Yandex,
- Visit webmaster.yandex.com and click on ‘Login‘.
- If you don’t have an account with them, you can create a new account, by selecting ‘Create ID‘.
- You can also log in with QR-code, Facebook, WhatsApp, or Twitter.
- After you have logged in, locate and tap the plus sign at the top of the site.
- On the next page, enter your URL and click on ‘Add‘.
Now, you need to verify your rights with Yandex webmaster. To do that,
- Go to ‘Settings’, and click on ‘Yandex.Metrica tags‘.
- On the next page, click on ‘Create a tag’.
- Fill the details, which includes your website address and tag name.
- Then, scroll down, click on ‘Create tag‘.
- Copy the meta tag and paste it at the ‘head’ section of your site.
How to paste Yandex webmaster meta tag code in a WordPress site
To add Yandex webmaster meta tag in a WordPress site,
- On your WordPress dashboard, go to Plugins, then click on ‘Add new’.
- Enter the keyword ‘Yoast SEO‘.
- When the plug-in appears, click ‘Install now‘. Also, click on ‘Activate‘.
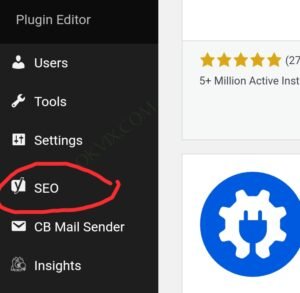
- Still on your WordPress dashboard, click on ‘SEO‘.
- Click on ‘General‘, and select ‘Webmaster Tools‘.
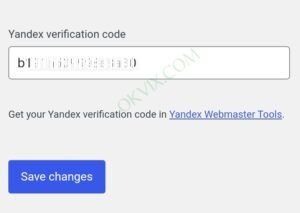
- Enter the meta tag in the Yandex box and click ‘Save changes‘.
- Finally, go back to Yandex webmaster, and click on ‘Check‘ to successfully verify your rights.


How to add sitemap to Yandex webmaster tools
Sitemap helps search engine bots to easily discover, and index your site’s content. To add a sitemap to Yandex webmaster,
- Go to webmaster.yandex.com and log in.
- Go to Indexing, and click on ‘Sitemap files‘.
- Enter your sitemap, then click ‘Add‘.
- You have now successfully submitted your sitemap.
How to check searchable pages after submitting your site to Yandex webmaster search engine.
To check searchable pages on Yandex webmaster, login, and click on ‘Indexing‘. Then, scroll down, and select ‘Searchable pages‘. There you will see a list of index pages.
Note: It takes about 2 week or more for new websites to be indexed on Yandex webmaster. So, be patient. For existing websites, it takes only few days.
Reasons why you need to index your site with Yandex webmaster.
- Optimization of your site for SEO (search engine optimization).
- Russian audience will always visit your site.
- You can check your sites stats.
- Check site information which consists of region, products, prices etcetera.
- In addition, you can check site qualities and reviews.
- Availability of craw rate.
