Do you need to boost your movement? Or create awareness? On this blog, you will discover, how to use GetDP in few seconds to create and share personalized brand, or images (Display picture) for your favorite candidate. This will help to boost his or her campaign, events, or brand.
A lot of candidates who have been successful, were boosted with GetDP. Your preferred brand or candidate would surely go viral. You must be aware that there are several factors involved for someone to win a contest, or let people know about a certain item, or brand.
The work of GetDP is to simply attach a thumbnail of your picture to the main brand, or candidate. This will show people that you’re in support of the candidate or brand. You don’t need to sign up to create a DP. It takes a minute to generate your do. You can only sign up if you want to use extra features.
How to attach your image to a flyer or brand.
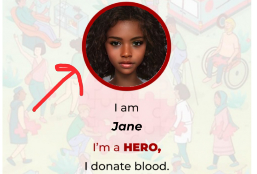
I will be using an already generated image of a candidate as an example to show you. After learning it, you can select for any candidate, or brand of your choice there.
- To do that, here
- Click on ‘I’d rather not‘ to avoid signing up, and speed up.
- Scroll down, and click on the bold plus (+) sign to upload your picture.
- Select your picture, and click done.
- Finally, click on ‘generate my DP‘, then download.
Once you’re done downloading it, you can check your phone, or laptop gallery.
Note: If you don’t like the current picture, you can choose to create a new one. The above link leads to a particular candidate as an example.
How to sign up with GetDP
- Visit this site and click on ‘Get started’
- Enter your name, email, and username.
- Finally, enter your password, and click on ‘sign up‘.
How to create and personalize image with GetDP
Login and click on ‘Create new DP banner‘. Then, do the following:
- Fill the basic information
- Set avatar location
- Also, set name preference
- Finally, preview and publish
Fill the basic information
On the basic information, fill the name, description. Then, select its category and tag. Upload the picture you prefer, enter a link (optional) and click on ‘next‘.
Set avatar location
Here, you will need to set where the thumbnail (sub image) will be located. Drag and select your preferred location. Then click the button ‘next‘.

Set name preference
You can choose to set name preference if you want. You can also, skip that. After that, click on ‘Preview and publish‘.
Preview and publish
Here, you will have to take a look at how it looks like. If you’re okay with it, you can now click on ‘Publish‘. You will automatically be redirected to the homepage, where you can copy the link and share. You can also, see its analytics including traffic, clicks.
In conclusion, GetDP can help you create a lot of awareness, which could hit up to millions of views, or followers depending on how people engage to it.
